Looking to transform the exterior of your home without the hefty price tag of replacing your siding? Painting vinyl siding is an excellent option! With the right preparation and tools, you can give your home’s exterior a refreshed, modern look that lasts for years.
This guide will walk you through everything you need to know about how to paint vinyl siding, covering key steps like preparing your siding, choosing the right paint, and applying it for a flawless finish. Here’s what we’ll cover:
- Why paint vinyl siding?
- Step-by-step guide to painting vinyl siding
- What to avoid when painting vinyl siding
🤔 How to Prepare Your Vinyl Siding

To prepare your siding for painting, start by thoroughly cleaning it to remove dirt, mold, and grime. Use a power washer for an efficient clean, or opt for a mixture of mild soap and water with a soft-bristle brush for a gentler approach. Work from the top down in sections to avoid streaking, and rinse thoroughly to ensure no soap residue remains. Allow the siding to dry completely, as painting over wet surfaces can lead to peeling or uneven coverage later on. Once it’s clean and dry, take the time to inspect the siding for any damage. Look for cracks, holes, or loose boards, as these issues need to be repaired before painting to ensure a smooth finish and long-lasting results.
After cleaning and repairing, it’s time to prepare the surface for paint. Lightly sand glossy or uneven areas to help the paint adhere better, using medium-grit sandpaper. This step is crucial for creating a textured surface that ensures the paint stays put. Be sure to wipe down the siding after sanding to remove any dust or debris. Next, protect areas you don’t want to paint, such as windows, doors, and trim, by covering them with painter’s tape and plastic sheeting. Taking these steps will help you achieve a professional-looking finish while keeping your home safe from any unintended paint splatters.
Choose the Best Paint for Vinyl Siding
- Color: Stick to colors similar to or lighter than the original siding color. Darker shades absorb more heat, which can cause the vinyl to warp.
- Type: Choose exterior paints formulated for vinyl, typically acrylic or latex paint, which are flexible and adhere securely to the surface.
- Finish: A satin or semi-gloss finish works best. It repels dirt and moisture better than flat finishes.
✅ 6 Step Painting Vinyl Siding

Painting vinyl siding can seem intimidating, but with proper guidance, it’s manageable. Here are the 6 essential steps to painting vinyl siding:
1. Check the Weather
Before starting your painting project, it’s essential to pay attention to the weather conditions. Extreme temperatures or high humidity can negatively impact the quality and durability of your paint job. Ideally, you should paint when the temperature is between 50°F and 80°F, as this ensures optimal drying and adhesion. Additionally, avoid painting in direct sunlight, as it can cause the paint to dry too quickly, leading to uneven results or cracking. Always check for rain in the forecast and wait for a clear, dry day to ensure your paint has ample time to set properly.
2. Prime (if Necessary)
Priming is an important step to consider, depending on the condition of your vinyl siding and the type of paint you’re using. Most modern vinyl paints are designed to adhere well without primer, provided the siding is in good condition and you’re not making a significant color change. However, if you’re planning to go from a very light color to a much darker one (or vice versa), a primer can help provide a smooth, uniform base for better coverage. Similarly, if the siding has any heavy damage, stains, or imperfections, applying a high-quality primer specifically formulated for vinyl can help mask these issues and ensure a longer-lasting finish.
3. Apply the First Coat
Once the surface is prepared, it’s time to apply the first coat of paint. Using a paint sprayer can be a great option for achieving an even, professional-looking finish, especially on larger surfaces. If you prefer more control or are working on smaller areas, a wide exterior paintbrush will allow you to apply the paint more precisely. Start at the top of the siding and gradually work your way down to avoid any drips or smudges as you go. Be sure to apply the paint in smooth, even strokes to create a consistent layer, which sets the foundation for the second coat.
4. Watch for Drips
As you work, keep a close eye on the paint for any drips, streaks, or uneven areas that may appear. These imperfections can dry quickly and become difficult to fix later, leaving you with a less-than-perfect finish. If you notice any drips, gently smooth them out with your brush or sprayer as soon as possible. Taking the time to address these issues during the process will save you from extra work later and ensure a clean, polished look once the project is complete.
5. Apply a Second Coat
After the first coat has dried completely—this usually takes about 4-6 hours, depending on the paint and weather conditions—it’s time to apply a second coat. This step is crucial for enhancing the durability of the paint job and achieving a more vibrant, consistent color. The second coat helps to cover any areas that may have been missed or uneven during the first application and adds an extra layer of protection against the elements. Be sure to follow the same method as before, starting at the top and working your way down, while keeping an eye out for drips or streaks.
6. Clean Up and Inspect
Once you’ve finished painting and the second coat has fully dried, it’s time to clean up your workspace. Carefully remove any painter’s tape, plastic sheeting, and drop cloths, and dispose of them properly. Next, take a thorough look at your work, inspecting the siding for any missed spots, uneven areas, or imperfections. If you notice any issues, take the necessary time to touch them up for a flawless result. A final inspection ensures that your paint job not only looks great but also provides lasting protection and curb appeal for your home.
🤔 What to Avoid When Painting Vinyl Siding

Some mistakes can lead to poor results. Make sure to avoid these:
Skipping the Cleaning Step
One of the most common mistakes is skipping the cleaning process before painting. Dust, grime, and grease can create a barrier that prevents the paint from properly adhering to the surface. Taking the time to clean ensures a smooth, long-lasting finish and avoids peeling or flaking down the line.
Using the Wrong Paint
Choosing the right type of paint is crucial for durability and appearance. For instance, oil-based paints, while durable, can be too rigid and prone to cracking over time, especially on surfaces that expand or contract. Always select the appropriate paint for the material and conditions you’re working with.
Painting in the Wrong Weather
Weather conditions can greatly impact how paint dries and adheres. Extreme temperatures, whether too hot or too cold, or high humidity can cause issues like uneven drying, poor adhesion, or even bubbling. Aim to paint on mild, dry days for the best results.
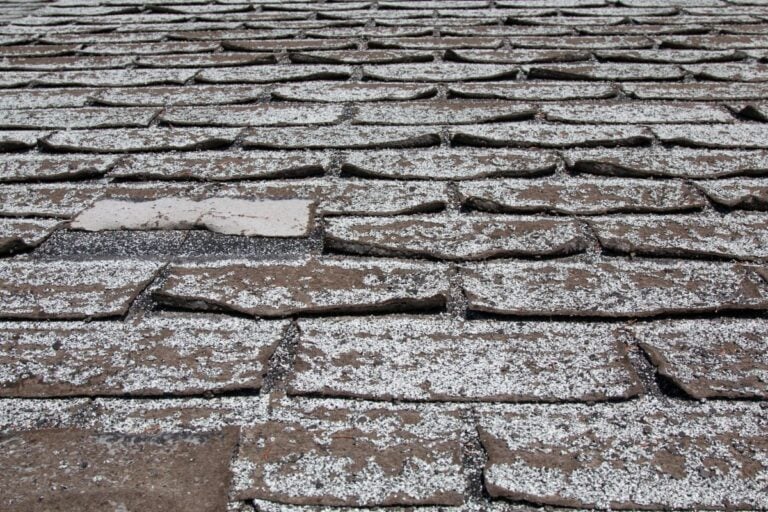
Skipping Repairs
Painting over cracks, gaps, or damaged areas without repairing them first can significantly reduce the lifespan of your work. These imperfections can cause the paint to wear or peel faster. Take the time to patch cracks, fill gaps, and sand down rough areas to create a stable and smooth surface before you paint.
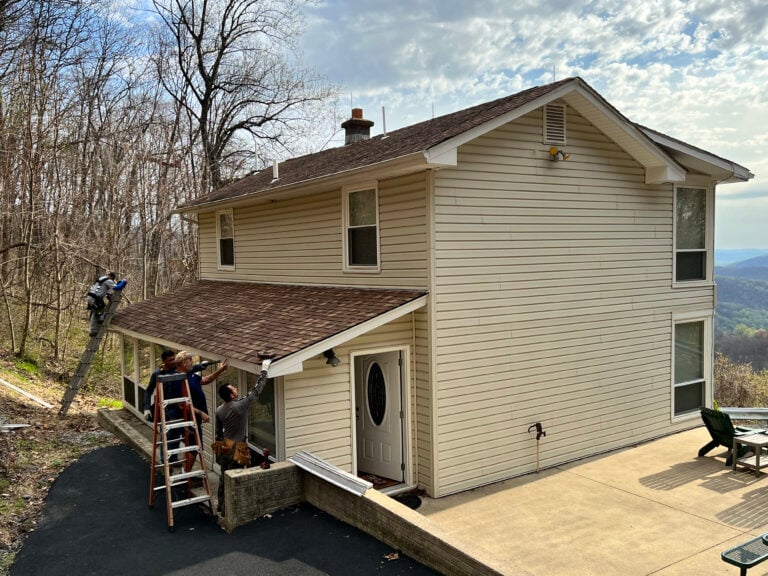
🏠 How to Paint Vinyl Siding
At the end of the day, painting vinyl siding can transform the look of your home, but it’s a project that requires careful planning and execution. When it comes to protecting and enhancing your home’s exterior, Springfield Roofing & Sheet Metal is the team you can count on. With over 30 years of experience serving Virginia homeowners, we’ve built a reputation for quality, reliability, and unmatched expertise.
Whether you’re tackling a siding project or need a trusted roofing professional, we’re here to help. Contact us today to schedule a consultation and let us bring your home improvement vision to life!