Knowing how to install drip edge correctly is one of those small but critical details that separates a roof that holds up for decades from one that lets water sneak in along the edges, and most homeowners never see it happen because it gets installed before the shingles go on. Drip edge is a strip of bent metal that runs along the eaves and gable edges of your roof, and its job is to direct water away from the wood underneath and into the gutter. Homeowners in Falls Church and surrounding areas should understand the basics of how it’s installed so they can spot a careful roofer versus a sloppy one. This guide walks through each step so you know exactly what to look for during your next roof replacement.
- What it is: A bent metal strip along the edges of the roof that guides water away from the wood.
- Why it matters: Drip edge is required by code and prevents rot, leaks, and ice damage.
- What to look for: A roofer who installs it in the right order, with proper overlaps and fastening.
What Is Drip Edge and Why Does Your Roof Need It?
Drip edge is a simple piece of metal flashing with a big job. Understanding what it does helps homeowners see why a good install is worth paying attention to.
What Does Drip Edge Actually Do?
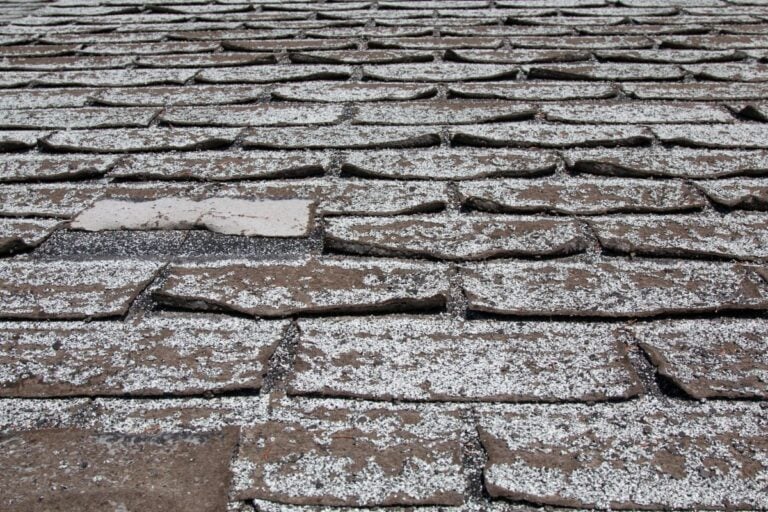
Drip edge directs rainwater away from the roof deck and fascia, sending it into the gutter instead of letting it run back under the shingles. Without drip edge, water can creep into the gap between the shingles and the fascia board by surface tension, then soak into the wood underneath. Over time, that leads to rotted fascia, soaked sheathing, and even ice dams that back water up under the roof. The metal strip also helps shingle edges resist wind lift, which matters in storm-prone areas like Falls Church and surrounding areas. A correctly installed drip edge is invisible from the ground but protects everything underneath it.
- Water control: Guides runoff into the gutter instead of behind it.
- Wood protection: Keeps fascia and sheathing dry over years of weather.
- Wind resistance: Helps secure shingle edges during storms.
- Ice dam prevention: Reduces the chance of water backing under shingles in winter.
Is Drip Edge Required by Code?
Drip edge is required by code for asphalt shingle roofs in most of the country, including Northern Virginia. The International Residential Code spells out where it goes, how big it must be, how far it must extend, and how it overlaps with underlayment. Older roofs from before 2012 might not have drip edge installed because earlier code editions didn’t require it, which is one of the most common findings during a roof inspection. Adding it during a roof replacement brings the home up to current standards and protects the new roof’s warranty. Skipping drip edge is one of the clearest signs of a roofer cutting corners.
- Code section: IRC R905.2.8.5 requires drip edge at eaves and rakes.
- Required since: The 2012 edition of the IRC.
- Where it goes: Both the bottom edges and the sloped sides of the roof.
- Local rules: Falls Church and surrounding areas follow IRC code requirements.
6 Steps of Installing Drip Edge on a Roof
Drip edge installation follows a clear order, and each step matters for the final result. Watching a careful roofer go through these stages tells you a lot about the overall quality of the work.
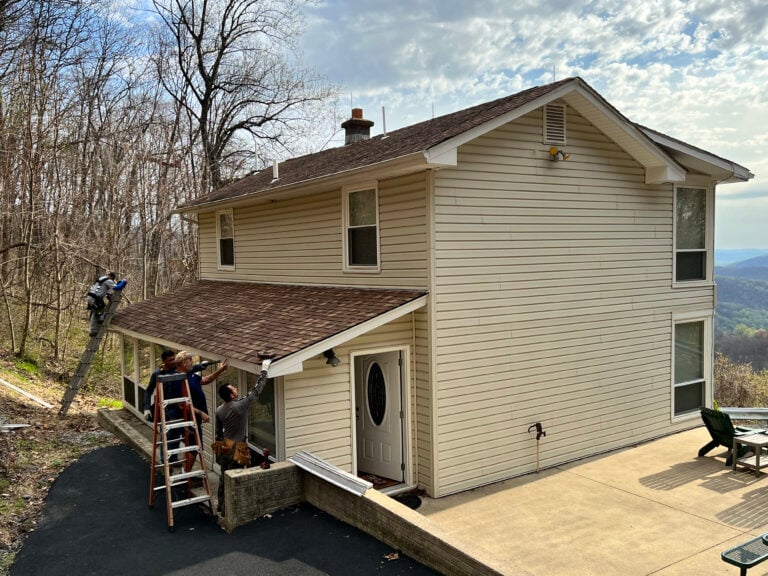
1. How Does the Roofer Prepare the Roof Edge?
The roofer prepares the roof edge by stripping off the old drip edge, checking the fascia and the edge of the sheathing for rot, and replacing any damaged wood. Old drip edge usually comes off with the shingles during tear-off, but sometimes it has rusted into place and takes a little extra work to remove. A close look at the fascia matters because water damage often hides behind the gutter, where homeowners can’t see it. If the fascia is soft or rotted, it has to be replaced before the new drip edge goes on, because new metal nailed to bad wood won’t hold. Skipping this step is one of the most common ways a budget roofer cuts corners.
- Old metal removed: All previous drip edge stripped off cleanly.
- Fascia check: Boards behind the gutter inspected for soft spots or rot.
- Sheathing edge check: The plywood or board edge inspected for damage.
- Replacement work: Any rotted wood replaced before new metal goes on.
2. What Type of Drip Edge Does the Roofer Choose?
The type of drip edge a roofer chooses depends on the roof style, local code, and the look the homeowner wants. The most common styles are called “L” style and “D” style (sometimes called “T” style). “L” style is a simple two-sided bent piece, while “D” style has a small extra bend at the bottom that pushes water further away from the fascia. Aluminum is the most common material because it doesn’t rust and comes in colors that match most roofs, but galvanized steel and copper are also options. A good roofer will explain the difference and pick the style that works best for your home. Falls Church and surrounding areas typically see “D” style on homes with deeper overhangs.
- L style: Simple bent metal with two sides, common on basic installs.
- D style: Has an extra kick at the bottom to push water further from the fascia.
- Aluminum: Most common, rust-resistant, available in colors.
- Steel or copper: Used for specific looks or longer service life.
3. How Is Drip Edge Installed at the Eaves?
Drip edge at the eaves goes on first, before the underlayment, and runs along the bottom edge of the roof where the gutter sits. The roofer lines up the metal so the bottom flange hangs out at least a quarter inch past the fascia, which makes sure water drips off the metal and into the gutter instead of curling back against the wood. Each section overlaps the next by at least 2 inches, and roofing nails go in every 12 inches or closer to hold it tight. After the eave drip edge is fastened, the underlayment rolls out on top of it, sealing the metal in place under the waterproof layer. This sequence is the opposite of what happens at the rake edges, which trips up less experienced installers.
- Goes on first: Installed before underlayment along the bottom edge.
- Quarter-inch overhang: Bottom flange extends past the fascia to direct water out.
- 2-inch overlap: Adjacent pieces lap to prevent gaps.
- Underlayment over: Felt or synthetic underlayment covers the metal.
4. How Is Drip Edge Installed at the Rake Edges?
Drip edge at the rake edges, which are the sloped sides of the roof, goes on after the underlayment, not before. The roofer rolls out the underlayment first, then lays the rake drip edge on top of it so the metal pins the underlayment down along the side. Water running down the rake edge stays on top of the metal and gets pushed away from the fascia. Like the eaves, each piece overlaps the next by at least 2 inches, and fasteners go in every 12 inches or closer. Getting the sequence right (underlayment first at the eaves under the metal, underlayment first at the rakes over the metal) is one of the most common code-compliance details a careful roofer gets right and a careless one gets wrong.
- Underlayment first: Felt or synthetic goes down before the rake drip edge.
- Metal on top: Drip edge laid over underlayment to pin it down.
- 2-inch overlaps: Same lap requirement as at the eaves.
- Order matters: Reversing the sequence creates leak points.
5. How Does the Roofer Handle Corners and Transitions?
Corners and transitions are where drip edge installs go right or wrong, because two pieces of metal meeting at a corner need to be cut, folded, and overlapped to seal properly. At a typical corner where the eave and the rake meet, the roofer cuts the eave piece long, then notches the rake piece so it slides over the top with a clean overlap. Some roofers also bend the corner of the metal back to create a tight seal that water can’t sneak through. The same care goes into spots where the roof changes pitch, has a dormer, or meets a wall. A poorly handled corner is one of the most common sources of edge leaks, especially in older homes in Falls Church and surrounding areas.
- Eave-to-rake corner: Eave piece extended and rake piece notched on top.
- Tight overlap: Clean joint with no gaps water can creep into.
- Bent or sealed corners: Some roofers fold and seal corners for extra protection.
- Pitch transitions: Spots where the roof slope changes need careful handling.
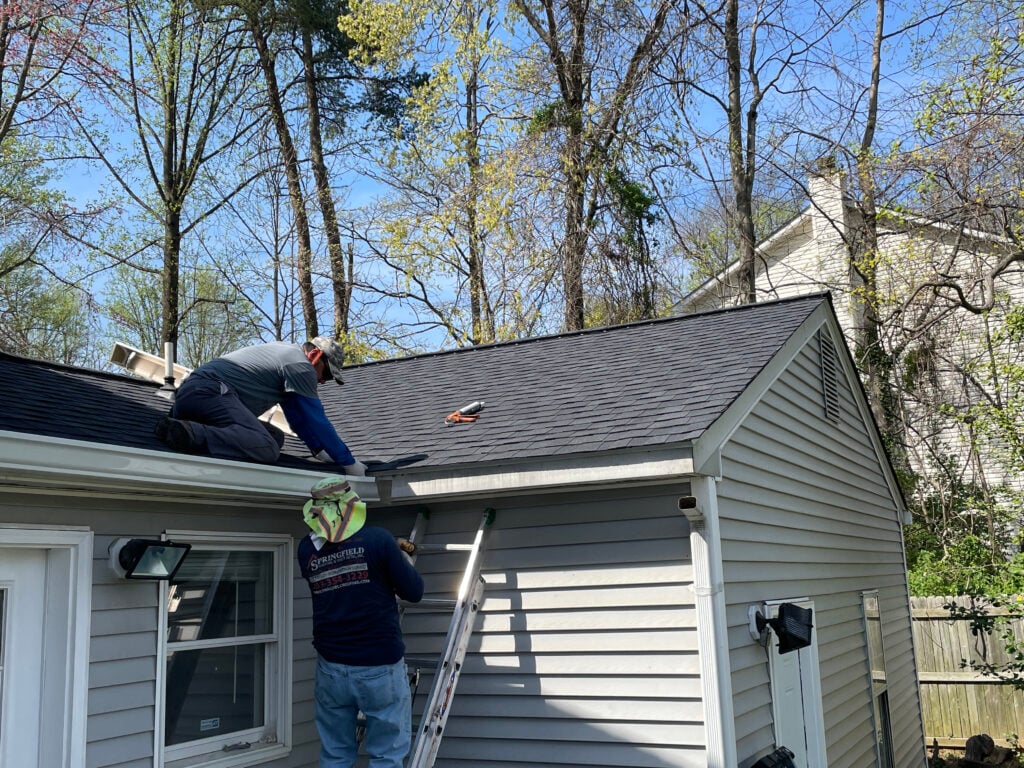
6. What Happens After the Drip Edge Is In Place?
Once the drip edge is in place, the roofer moves on to installing the rest of the roof system on top of it. Ice and water shield goes down in the valleys and along the eaves, the underlayment rolls out across the rest of the deck (over the eave drip edge and under the rake drip edge), and then the shingles get nailed down from the bottom up. The starter strip of shingles overlaps the eave drip edge, sealing the bottom of the roof against wind and water. From this point on, the drip edge becomes invisible behind the gutter and shingle line, but its job continues for the entire life of the roof. A careful inspection at the end of the install verifies every piece is properly lapped and fastened.
- Ice and water shield: Self-sealing membrane added in valleys and at eaves.
- Full underlayment: Synthetic or felt rolled out across the entire deck.
- Starter shingles: Overlap the eave drip edge to seal the bottom edge.
- Final check: Roofer or inspector verifies all overlaps and fastening.
How to Tell if Your Drip Edge Was Installed Correctly
Most drip edge ends up hidden behind the gutter line, but there are a few signs you can spot from the ground or from a careful look up close. Knowing what to check helps homeowners verify the work after the job is done.
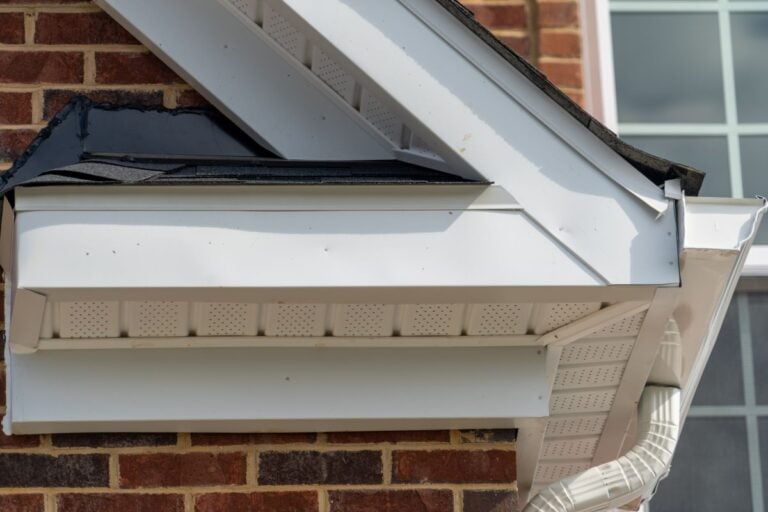
What Should You Look for from the Ground?
From the ground, homeowners should be able to see a thin strip of metal running along the edge of the roof, just above the gutter line. The metal should be continuous along the entire eave and rake, with no gaps where two pieces meet but don’t overlap. The color should match the fascia or shingles, depending on the style chosen. Drip edge that’s bent, warped, or sticking out at odd angles points to a sloppy install or a piece that wasn’t secured well. Homeowners in Falls Church and surrounding areas can usually spot most of these issues just by walking around the house and looking up.
- Continuous metal strip: No gaps along the eave or rake.
- Matching color: Coordinates with shingles or fascia.
- Straight lines: No bending, warping, or curling.
- Sits above the gutter: Metal flange visible just over the gutter line.
What Are the Warning Signs of a Bad Drip Edge Install?
Warning signs of a bad drip edge install include visible gaps between pieces, exposed underlayment along the edges, a drip edge that ends short of the corners, or fascia rot showing up within a few years of a new roof. Some roofers skip drip edge entirely on the rake edges to save time and material, which is a clear code violation. Other times, the drip edge gets nailed too far apart or installed in the wrong order with the underlayment. If you see water staining the fascia or running behind the gutter during rain, that’s a sign water isn’t being directed where it should be. Document any concerns with photos and bring them to the contractor right away.
- Visible gaps: Spots where two pieces don’t overlap correctly.
- No drip edge on rakes: A code violation and a leak risk.
- Fascia staining: Water marks on the wood behind the gutter.
- Loose or rattling metal: Drip edge that wasn’t nailed tightly enough.
Frequently Asked Questions
How much does drip edge installation cost?
Drip edge installation is usually included in the base price of a roof replacement and doesn’t appear as a separate line item. Standalone drip edge installation, added without other work, typically costs $2 to $5 per linear foot. For an average home with about 200 linear feet of roof edge, the total cost is around $400 to $1,000.
Can you install drip edge on an existing roof?
Yes, drip edge can be added to an existing roof, but it’s much harder than installing it during a roof replacement because the roofer has to carefully lift shingles to slide the metal underneath. Most roofers will recommend waiting until your next replacement unless you’re seeing active fascia damage. Retrofitting drip edge on an existing roof typically runs $5 to $10 per linear foot.
What happens if a roof doesn’t have drip edge?
A roof without drip edge is more likely to develop rotted fascia, water-damaged sheathing, ice dam leaks, and edge shingles that lift in storms. Newer roofs without drip edge are also not up to code, which can cause problems during a home inspection if you sell the house. Adding drip edge is usually the cheapest insurance against edge-related water damage.
How long does drip edge last?
Aluminum drip edge typically lasts 20 to 30 years or longer, which usually matches the life of an asphalt shingle roof. Steel drip edge can last even longer if galvanized and properly painted, while copper drip edge can last 50 years or more. Drip edge is typically replaced as part of the next roof replacement.
Does drip edge come in different colors?
Yes, aluminum drip edge comes in a range of colors including white, brown, black, and shades that match common shingle colors. Most roofers will discuss color choice during the quote so the drip edge blends with either the fascia or the roof. Custom colors are also available for an extra charge.
Do I need a permit for drip edge installation?
Drip edge installation by itself usually doesn’t require a permit, but it’s almost always done as part of a full roof replacement, which does require one in Falls Church and most local jurisdictions. Reputable contractors handle the permit process as part of their service. Adding drip edge to an existing roof as a standalone job may or may not require a permit depending on local rules.
Choose Springfield Roofing & Sheet Metal for Proper Drip Edge Installation
When it comes to small details like how to install drip edge, the difference between a careful roofer and a sloppy one shows up years later in either a roof that performs as it should or one with rotted fascia and edge leaks. Springfield Roofing & Sheet Metal is a 1st and 2nd generation family-owned and operated company serving Falls Church and surrounding areas with a dedicated in-house crew, full labor and material warranties, and CertainTeed 5-Star Select Shingle Master certification, which is held by only a small percentage of roofing contractors nationwide. We follow every code requirement and manufacturer specification, including drip edge installation, because the details are what make a roof last. Contact Springfield Roofing & Sheet Metal today for a free estimate and find out what code-compliant, careful roofing actually looks like.